

Two Weeks - Grizzly Bear from Gabe Askew on Vimeo.
I just thought I would post this since I have found this workflow helpful for working with EX-1 Footage and I don't have time to convert it to a more stable codec like Apple ProRes or Animation codec. Install XDCam Transfer, the FCP XDCam codecs and drivers for your system. These can be found on Sony's website. Take your BPAV folder into XDCam Transfer and 'Import' it to a location that you are planing for you project. (This will convert it to an XDCam codec Quicktime which is based on the MPEG-4 codec) Once the transfer is complete, open FCP 6 and set up your scratch discs and projects accordingly. (You must have FCP 6 otherwise you'll need to convert all your clips to another codec to do your edit with) Import your clips into FCP from the folder you imported them to while you were in XDCam Transfer. Set up a sequence (name it something like "Blah Blah XDCam Edit 01") to the Native settings of the footage by dragging any clip from your Browser into the "Blah Blah XDCam Edit 01" sequence. FCP will ask if you want to match the settings of the sequence to the clip. Say 'Yes'. Edit your little heart out but don't add anything to the footage like Text, Solids, etc... otherwise you will spend a heck of a lot of time waiting for renders and then a heck of a lot of time wondering why the heck your stuff looks like heck (hell?). Once you are good with your footage edit that you have done in your "Blah Blah XDCam Edit 01" sequence, set up a new sequence. Lets call this one "Blah Blah GFX Edit 01". Select your "Blah Blah GFX Edit 01" sequence and change its settings to whatever you like but here is what I use for SD Widescreen: 853x480 Square Pixel Aspect Change the compressor to Animation (or ProRes if you like). When you have "Blah Blah GFX Edit 01" all set up go to your "Blah Blah XDCam Edit 01" sequence and copy your edit. Then in your "Blah Blah GFX Edit 01" sequence paste. This should bring in your edit. Once you are done with your graphics and so on, go to: File>Export>Quicktime Movie Name the file (For long form edits I deselect the 'Make Movie Self Contained') Once the export is done, open Compressor. Import your file into Compressor and set up your settings and you are golden.
So things are going alright with the NewerTech eSATA setup but I have found one issue that gives me a bit of grief.
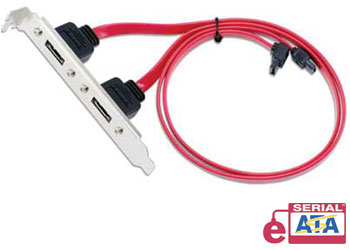
I just installed a NewerTech eSATA Extender Cable into my system (Mac Intel 3.0 8-core 20gb ram Leopard) after looking for some solutions to get more out of the 20-40 Western Digital Hard Drives we have lying around our office but rarely like to use since the fastest connection they have is 400 firewire which goes quite sluggish when we work with our r3d and HD files. The other thing I was looking for was a way to maximize the flow of data on my system. Right now I have the OS and the Apps on one 350gb hard drive, two 500gb striped together which I use to write to with the forth slot free. Oh and we have a 8tb server that I pull footage from for various projects (that server is worth every penny bytheway). I wanted another storage option for when I need to pull a project from our server to take off-site but still be able to work at the high speeds I need or if I just need to expand out my storage.
So... here I am. I guess :)